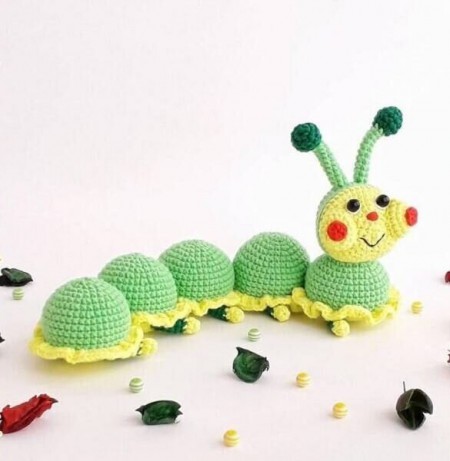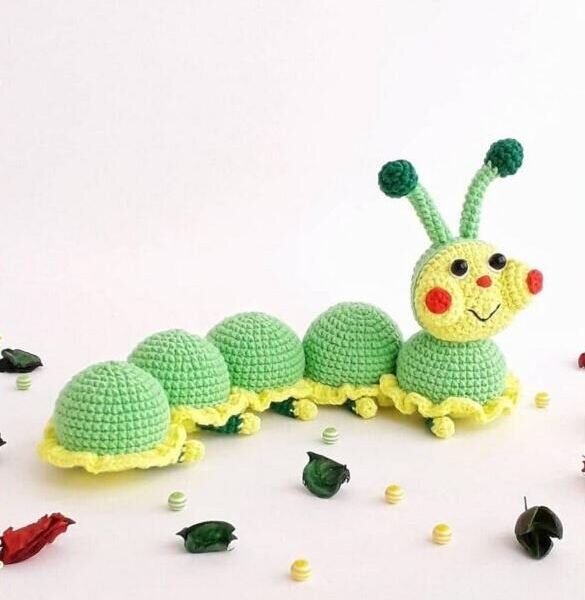
Amigurumi Cute Caterpillar Free Pattern
Hello dear Amigurumi enthusiasts! Today I would like to share with you a free Amigurumi Animal pattern and construction instructions. Amigurumi has become a popular hobby in the world of craftsmanship, and in this article I will present you a great Amigurumi Animal design. Trust your imagination while doing amigurumi. And dare to create your own unique designs. Welcome to the Amigurumi world, enjoy fun handicraft projects.
MATERIALS
* Yarnart jeans, or any similar yarn, in four colors.
* Filler holofiber or synthetic fluff
* Half-bead eyes
* Hook No. 2
ABBREVATIONS
SC – single crochet
sl-st – slip stitch
HDC – half double crochet
DC – double crochet
CH – chain
DEC – decrease, knit 2 loops together
INC-increase, 2sc or HDC knit in one loop
LEGS 10 PARTS
1p) We start with a yellow thread 6 sc into magic ring
2p) 6sc
3p) Change the thread to green 6sc
4-7r) 6sc
Close the hole, cut and hide the thread.
HORNS 2 PIECES
We start with a dark green thread
1р) 6sc into magic ring
2p) 6 increments = 12sc
3-4p) 12sc
5p) 6 decreases = 6sc
lightly fill with filler
6p) Change to light green thread 6sc
7-15r) 6sc
We fasten the thread, leave the end for sewing.
BODY 5 PARTS
1p) Green thread 6sc into magic ring
2p) 6inc = 12sc
3p) (1sc, inc) * 6 = 18sc
4p) (2sc, inc) * 6 = 24sc
5p) (3sc, inc) * 6 = 30sc
6p) (4sc, inc) * 6 = 36sc
7p) (5sc, inc) * 6 = 42sc
8-12r) 42sc
13p) Change the thread to yellow and knit behind the back wall of the loops = 42sc
We fill the part with filler while knitting.
14p) (5sc, dec) * 6 = 36sc
15p) (4sc, dec) * 6 = 30sc
16p) (3sc, dec) * 6 = 24sc
17p) (2sc, dec) * 6 = 18sc
18p) (1sc, dec) * 6 = 12sc
We tighten the hole, cut and hide the thread.
We attach a yellow thread to the half-loops of the 13th row and knit a frill, two double crochets in each
loop.
HEAD 1 PIECE
1p) Green thread 6sc into magic ring
2p) 6inc = 12sc
3p) (1sc, inc) * 6 = 18sc
4p) (2sc, inc) * 6 = 24sc
5p) (3sc, inc) * 6 = 30sc
6p) (4sc, inc) * 6 = 36sc
7p) (5sc, inc) * 6 = 42sc
8-10r) 42sc
11p) Change the thread to yellow and knit behind the back wall of the loops = 42sc
We fill the part with filler while knitting.
12-13r) 42sc
14p) (5sc, dec) * 6 = 36sc
15p) (4sc, dec) * 6 = 30sc
16p) (3sc, dec) * 6 = 24sc
17p) (2sc, dec) * 6 = 18sc
18p) (1sc, dec) * 6 = 12sc
We tighten the hole, cut and hide the thread.
CHEEKS 2 PARTS
1p) Yellow thread 6sc into magic ring
2p) 6inc = 12sc
3p) (1sc, inc) * 6 = 18sc
4p) 18sc
We fix the thread, leave the tip for sewing.
So almost all the details of the toy are ready, there are overlays on the cheeks, everything is simple there, a circle of 5 or 6 sc into a magic ring and sew it to the main cheeks.
Next, we collect all the parts of the body, by sewing to each other with a strong thread of an identical color, I did it with the same yarn that I knitted the parts.
We design the head and sew it to the body. Well, the last we attach the legs with a thread fastening to each part of the caterpillar body. You can just sew them on, but I love that they can be moved with a thread mount.
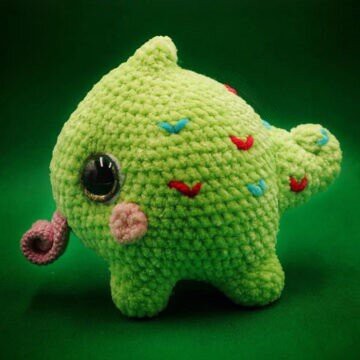
It's All Finished:


