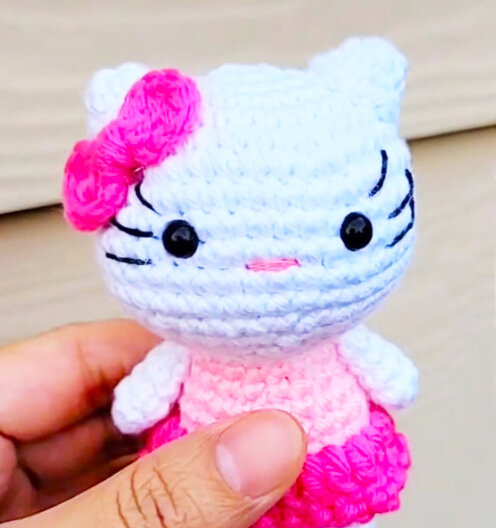
Amigurumi Hello Kitty Free Pattern
Hello dear Amigurumi enthusiasts! Today I would like to share with you a free Amigurumi Free Pattern pattern and construction instructions. Amigurumi has become a popular hobby in the world of craftsmanship, and in this article I will present you a great Amigurumi Free Pattern design. Trust your imagination while doing amigurumi. And dare to create your own unique designs. Welcome to the Amigurumi world, enjoy fun handicraft projects.
Materials
• Yarn, to use 8/4 100% cotton (50g/170m, superfine) in three colors white for the main body and light pink and dark pink.
• 2 mm hook
• 6 mm safety eyes
• Scissors
• Needle
• Pins
• Fiber filling
Abbreviations
(sc)/(sc): Single crochet
(BO) Hazelnut stitch
(ml)/(ch): Chainette, Air stitch
(MR): Magic ring
(dim)/(dec): decrease, decreasing, decrease
(augm) /(inc): increase
(M)/(st): Stitch (pt) stitch
(FLO): work only in front loops
(BLO): work only in back loops
(d-dc,dble.b)/( tr): Double treble crochet
(br)/(dc): Double treble crochet
(dB)/(hdc): Half treble crochet
(sc)/(sl-st): Slip stitch, small stitch
(db / dbr) (dtr): Double treble crochet
(mct)/(tch): chain stitches to turn
(3msm)/(sc3tog): 3 sc in the same stitch
(Fo): Stop the thread.
(3 dc tog): 3 treble crochets together
Head
Rnd 1: 6sc in MR (6)
Rnd 2:*inc x6 (12)
Rnd 3:*1inc, inc* x6 (18)
Rnd 4:*2inc, inc x6 (24)
Rnd 5:*3inc, inc x6 (30)
Rnd 6:*4inc, inc x6 (36)
Rnd 7:*5inc, inc x6 (42)
Rnd 8-13:5 rounds with sc (42)
Tie eyes between R9-R10 with 6 sts apart .
Rnd 14:*5sc, dimx6 (36)
Rnd 15:*4sc, dimx6(30)
Rnd 16:*3sc, dimx6 (24)
Begin to firmly fill the head.
Rnd 17:2ms, dimx6 (18)
Fill in a little more if you need as you finish.
Rnd 18:1sc, Sun (12)
Finish with a sl st and Fo
Leave a long thread to sew the head to the body.
Ears (x 2)
Rnd 1. 6 sc in MR
Rnd 2. *1 sc, inc x3 (9)
Rnd 3. *1 sc, inc x3 (12)
End with a sl st and leave a long thread of wool to sew at the head later.
Arm (do 2)
Rnd 1. 6 sc in MR (6)
Rnd 2-5. 4 round sc in each row
At the end of the last row make 1 sl st, 1 ch, cut the yarn and fasten it inside.
Legs (x 2)
Rnd 1. 6 sc in MR (6)
Rnd 2. *inc, x6 (12)
Rnd 3-8. 5 rounds with sc (12)
1st leg: at the end of the last row make 1 sl st, 1 chain, cut the thread and pass it inside.
Second leg: do not cut the thread, continue to crochet and make 6 sc and join with the other piece of leg.
Body
Rnd 9. 12 sc in the second legs and join the first legs doing 6 sc (24)
Change the yarn to pink and cut the white yarn.
Round 10-11. 2 sc rows in each st (24)
Round 13-14. 2 sc rows in each st (24)
Rnd 15. *2ms, dim x6 (18)
Rnd 15. *1ms, dim x6 (12)
Make skirt
Rnd 1. ch 2, dc in each st all the way around and finish with a sl st.
Rnd 2. Ch 2, sl st, and repeat all the way around with a slip stitch and weave in the ends.
After sewing the ears together.
Now embroidering the lips, insert the needle one stitch below the eyes and embroider the lips in two stitches.
How it looks after embroidering the lips.
Take the bow and glue it with a glue gun.
Make 3 lines on both sides for the whiskers on both sides.
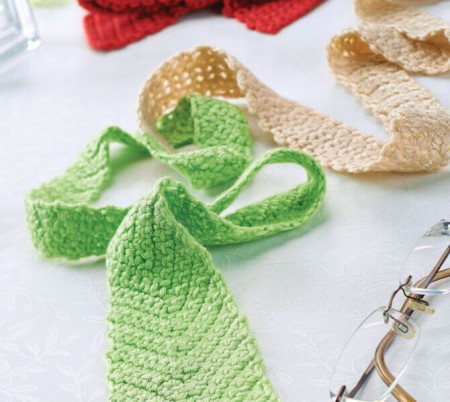
Bow tie for Mr head
: 3 chains, 2 treble crochets, 3 sl sts in chain, 3 chains again and repeat the same thing.
Assembly of the parts
The head.
Pin the ears at 3 points from the head and sew them together.
Pin the hands just where you sewed the head and sew them.

