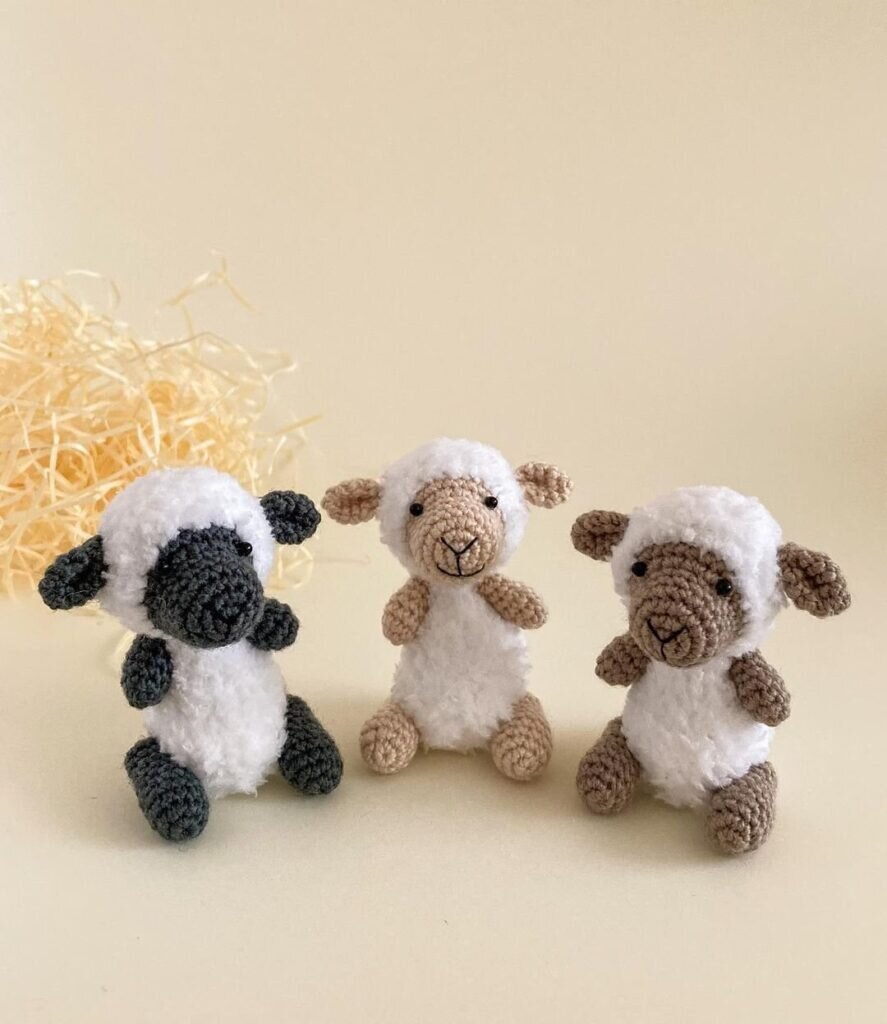
Amigurumi Lamb Crochet Pattern
Hello dear Amigurumi enthusiasts! Today I would like to share with you a free Amigurumi Lamb pattern and construction instructions. Amigurumi has become a popular hobby in the world of craftsmanship, and in this article I will present you a great Amigurumi Lamb design. Trust your imagination while doing amigurumi. And dare to create your own unique designs. Welcome to the Amigurumi world, enjoy fun handicraft projects.
To tie the toy we will need:
1. Yarn of two kinds-acrylic beige color, kartopu bebe Anakuzusu (crumb or similar yarn).
2. Black Yarn for muzzle design (acrylic).
3. Eyes – I have this acrylic scissors.
4. Superglue.
5. Hooks under the yarn.
– Number 7 – for textured yarn
– Number 2.5 – for paws, ears and tail
– Number 1.9 – for muzzle
– Number 1.75 – for sewing parts
6. Decoration – Satin Ribbon.
7. Filler (sintepuh or polyester).
D-Raise
UB-Decrease
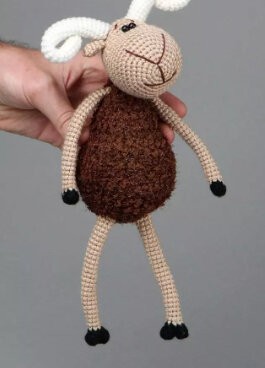
Let’s start knitting with the torso (textured brown yarn and hook № 7)
1:6 prs in the ring = 6
2: (1 d) * 6 times = 12
3: (1 PRS, 1 d) * 6 times = 18
4: (2 PRS, 1 d) * 6 times = 24
5: (3 PRS, 1 d) * 6 times = 30
6: (4 PRS, 1 d) * 6 times = 36
7: (5 PRS, 1 d) * 6 times = 42
8: (6 PRS, 1 d) * 6 times = 48
9-13:48 PRs in a circle
14: (6 PRS, 1 UB) * 6 times = 42
15: (5 PRS, 1 UB) * 6 times = 36
16: (4 PRS, 1 UB) * 6 times = 30 You can start beating your head
17: (3 PRS, 1 UB) * 6 times = 24
18: (2 PRS, 1 UB) * 6 times = 18 to beat more densely
19: (1 PRS, 1 UB) * 6 times = 12
20:1 UB * 6 times = 6. Pull the cloth, fasten the thread, finish knitting.
Then we will knit the head, it consists of two parts, shaggy and not shaggy =))
Crochet № 7 and textured yarn Knit shaggy part:
1:6 prs in the ring = 6
2: (1 d) * 6 times = 12
3: (1 PRS, 1 d) * 6 times = 18
4: (2 PRS, 1 d) * 6 times = 24
5:24 PRs in a circle
6 row: (2 PRS, 1 UB) * 6 times = 18
Fasten the thread, finish knitting.
Not shaggy part fit crochet № 1.9 and beige acrylic:
Dial 5 vp.
1: in 2 loop from crochet knitting 1pr, 2SBN, 4SBN in 1 loop, 2SBN, d = 12
2: D, 4SBN, 3PR, 3SBN, 2PR = 18
3: (1 PRS, 1 d) * 9 = 27
4: (2 PRS, 1 d) * 9 = 36
5: (5 PRS, 1 d) * 6 = 42
6: (6 PRS, 1 d) * 6 = 48
7: (7 PRS, 1 d) * 6 = 54
8-9:54 PRs in a circle
10: (7 PRS, 1 UB) * 6 = 48
11: (6 PRS, 1 UB) * 6 = 42
12-13:42 PRs in a circle
14: (5 PRS, 1 UB) * 6 = 36
15: (4 PRS, 1 UB) * 6 = 30
16:30 PRs in a circle
Thread fasten, leave very! The long end for sewing, because we will need not only to sew the head of the parts, but also to sew it to the torso.
It is possible, however, to sew a head to a trunk a separate thread. Then do as you will be comfortable.
Do not forget to beat tightly face)
Now you need to sew the shaggy part to the muzzle with the help of acrylic yarn that we left. Fill your head tightly with filling, give shape.
Finish knitting.
I sew my head to the torso hook № 1.9. Part of the head sew Crochet № 1.75.
The hardest thing, in my opinion, is behind. Now we’re going to knit a ponytail!
Tail (acrylic yarn beige color):
1:6 prs in the ring = 6
2: (1 d) * 6 times = 12
3: (1 PRS, 1 d) * 6 times = 18
4-5:18 PRs in a circle
6: (1 PRS, 1 UB) * 6 times = 12
To put a ponytail, to leave a thread for sewing.
Council! First sew the head to the torso, then the tail, then the front paws, then the rear. This order will help to sew all the details symmetrically. After the sewing of the front paws your toy should already stand and do not crash.
Paws (Beige acrylic, 4 pcs):
1:6 prs in the ring = 6
2: (1 d) * 6 times = 12
3: (1 PRS, 1 d) * 6 times = 18
4: (2 PRS, 1 d) * 6 times = 24
5-10:24 PRs in a circle
11: (2 PRS, 1 UB) * 6 times = 18
Leave the sewing thread and fill the details with the filling.
Left to tie the ears (acrylic, 2 pcs):
1:6 prs in the ring = 6
2: (1 d) * 6 times = 12
3: (1 PRS, 1 d) * 6 times = 18
4: (2 PRS, 1 d) * 6 times = 24
5-11:24 PRs in a circle
12: (2 PRS, 1 UB) * 6 times = 18
13:18 PRs in a circle
14: (1 PRS, 1 UB) * 6 times = 12
The ears must first be folded in half and sew at the base, and then already sew to the head. At what to sew it is necessary to a nonshaggy part of a head.
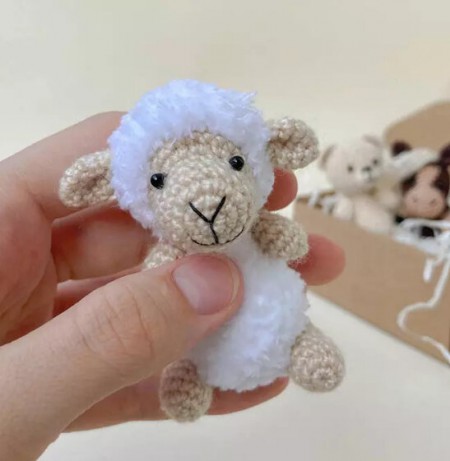
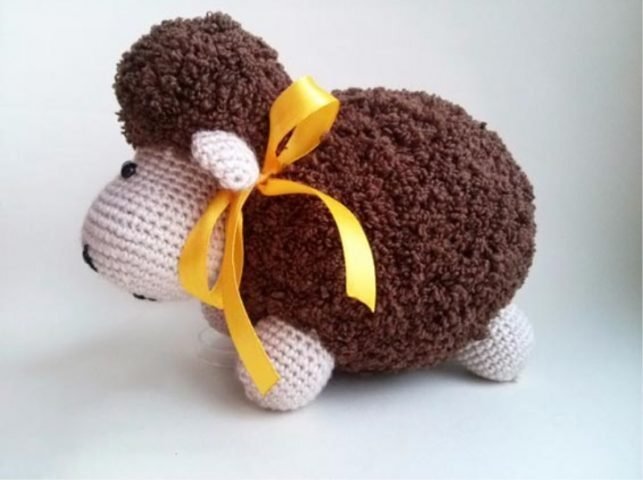
After all the details are sewn on their seats, including the ears =), proceed to the design of faces. The black thread embroider a smile and nostrils. Glue eyes, do not forget to follow the symmetry!
You can tie a bow from the satin ribbon or decorate the toy to your liking.
It's All Finished: