Amigurumi Squirrel Free Pattern
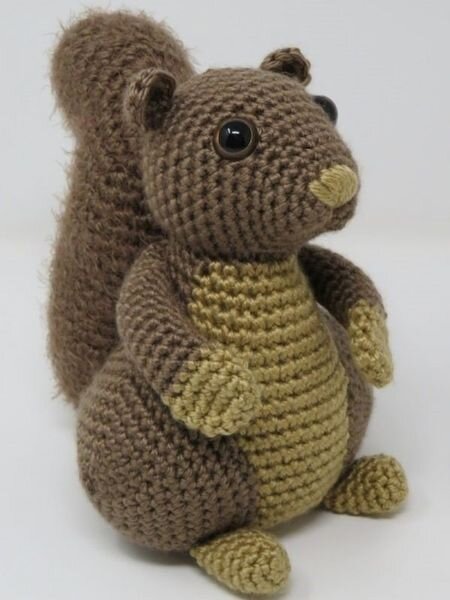
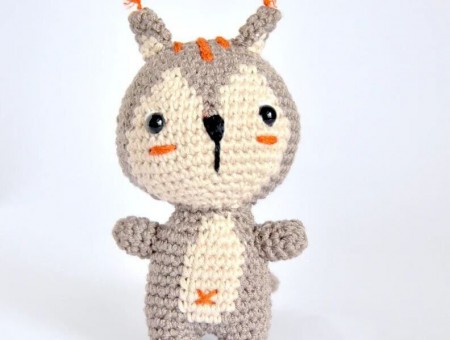
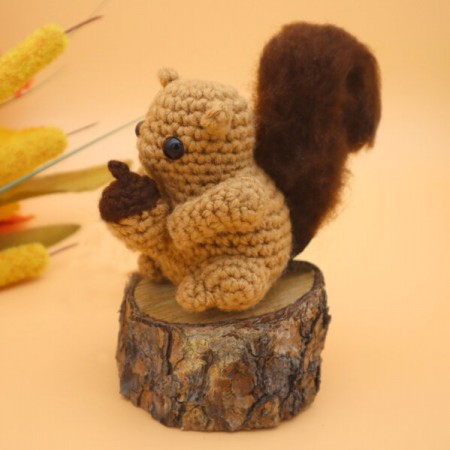
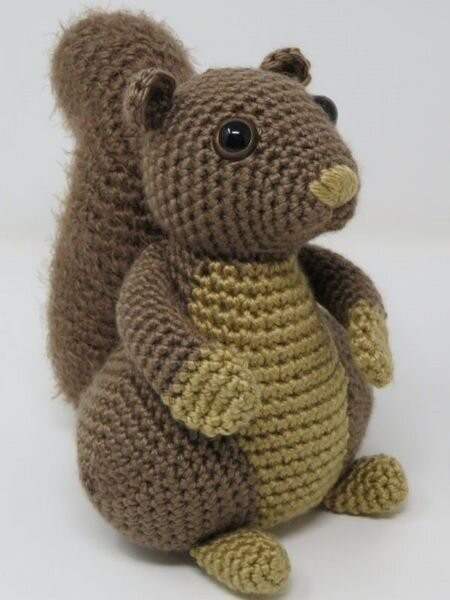
Hello dear Amigurumi enthusiasts! Today I would like to share with you a free Amigurumi Squirrel pattern and construction instructions. Amigurumi has become a popular hobby in the world of craftsmanship, and in this article I will present you a great Amigurumi Squirrel design. Trust your imagination while doing amigurumi. And dare to create your own unique designs. Welcome to the Amigurumi world, enjoy fun handicraft projects.
Materials
- Red Heart Soft worsted weight yarn, 100% acrylic, 256 yds / 5 oz / 141 g, 1 ball (20 yds) #E728 Cocoa (MC), < 1 ball #7933 Wheat (AC1)
- Red Heart Hygge bulky yarn, 70% acrylic, 30% nylon, 132 yds / 5 oz / 141 g, 1 ball #E869 Latte (AC2).
- G (4.25 mm) crochet hook
- Two 15 mm brown safety eyes
- Fairfiled Poly-Fil Fiber Filling
- Tapestry needle
- Straight pins
- Stitch markers (if desired)
Gauge
- Gauge is not important for amigurumi. Be sure to use the same hook throughout to ensure proportional size.
Abbreviations Used in This Pattern
- [] Repeat instructions between brackets as indicated.
- AC1 – Accent Color 1
- AC2 – Accent Color 2
- ch – chain
- dec – decrease (sc2tog) – Watch a helpful video tutorial by Whistle & Ivy here.
- inc – increase (2 sc in next st)
- MC – Main Color
- sc – single crochet
- sc join – With slip knot on hook, insert hook into stitch, yo, pull up a loop, yo pull through both loops on hook.
- sl st – slip stitch
Pattern Notes
- Work in continuous rounds unless otherwise specified by pattern.
- For best results, assemble parts in order specified by pattern.
- Do not weave in ends of each part until the end. This allows for repositioning of parts if needed.
- Ch-3 at beginning of round counts as dc.
- Pattern Difficulty Level: Easy
- Terminology Used (U.S. or U.K.): US
Pattern Instructions
Body
- With MC, ch 2.
- Rnd 1: 6 sc in second ch from hook. (6)
- Rnd 2: Inc in each st around. (12)
- Rnd 3: [sc, inc] 6 times. (18)
- Rnd 4: [2 sc, inc] 6 times. (24)
- Rnd 5: 12 sc, change to AC1, 12 sc. (24)
- Rnd 6: Change to MC, [3 sc, inc] 3 times, change to AC1, [3 sc, inc] 3 times. (30)
- Rnd 7: Change to MC, 15 sc, change to AC1, 15 sc. (30)
- Rnd 8: Change to MC, [4 sc, inc] 3 times, change to AC1, [4 sc, inc] 3 times. (36)
- Rnd 9: Change to MC, 18 sc, change to AC1, 18 sc. (36)
- Rnd 10: Change to MC, [5 sc, inc] 3 times, change to AC1, [5 sc, inc] 3 times. (42)
- Rnd 11: Change to MC, 21 sc, change to AC1, 21 sc. (42)
- Rnd 12: Change to MC, [6 sc, inc] 3 times, change to AC1, [6 sc, inc] 3 times. (48)
- Rnds 13-20: Change to MC, 24 sc, change to AC1, 24 sc. (48)
- Rnd 21: Change to MC, [6 sc, dec] 3 times, change to AC1, [6 sc, dec] 3 times. (42)
- Rnd 22: Change to MC, [5 sc, dec] 3 times, change to AC1, [5 sc, dec] 3 times. (36)
- Rnd 23: Change to MC, [4 sc, dec] 3 times, change to AC1, [4 sc, dec] 3 times. (30)
- Rnd 24: Change to MC, [3 sc, dec] 6 times. (24)
- Rnd 25: [2 sc, dec] 6 times. (18)
- Stuff.
- Rnd 26: [sc, dec] 6 times. (12)
- Rnd 27: Dec 6 times. (6)
- Bind off leaving long tail for sewing. Thread tail through remaining 6 sts, pull tight to close. Weave in ends.
Head
- With MC, ch 2.
- Rnd 1: 6 sc in second ch from hook. (6)
- Rnd 2: Inc in each st around. (12)
- Rnd 3: [2 sc, inc] 4 times. (16)
- Rnd 4: [3 sc, inc] 4 times. (20)
- Rnds 5-6: Sc evenly around. (20)
- Rnd 7: [4 sc, inc] 4 times. (24)
- Rnd 8: [5 sc, inc] 4 times. (28)
- Rnd 9: [6 sc, inc] 4 times. (32)
- Rnd 10: [7 sc, inc] 4 times. (36)
- Rnds 11-16: Sc evenly around. (36)
- Insert safety eyes between Rounds 9 and 10, 7 sts apart. Position eyes so the space between them is on a flat side of the head, giving the squirrel a flat forehead and face.
- Rnd 17: [4 sc, dec] 6 times. (30)
- Rnd 18: [3 sc, dec] 6 times. (24)
- Rnd 19: [2 sc, dec] 6 times. (18)
- Stuff.
- Rnd 20: [sc, dec] 6 times. (12)
- Rnd 21: Dec 6 times. (6)
- Bind off leaving long tail for sewing. Thread yarn through remaining 6 sts and pull tight to close.
- Attach head to narrow end of body around Round 4, between Rounds 9 and 16 of the head. Center narrow end of head over AC1 side of body.
Ears (Make 2)
- With MC, ch 4.
- Row 1: 8 dc in fourth ch from hook. (see Pattern Notes) (9)
- Sl st in top of ch-3 to join.
- Bind off leaving long tail for sewing.
- Sew 2 stitches of ears to head along Round 16, 8 sts apart, aligned with eyes.
Hind Legs (Make 2)
- With MC, ch 2.
- Rnd 1: 6 sc in second ch from hook. (6)
- Rnd 2: Inc in each st around. (12)
- Rnd 3: [sc, inc] 6 times. (18)
- Rnd 4: [2 sc, inc] 6 times. (24)
- Rnd 5: [3 sc, inc] 6 times. (30)
- Rnd 6: [4 sc, inc] 6 times. (36)
- Rnd 7: [5 sc, inc] 6 times. (42)
- Rnds 8-11: Sc evenly around. (42)
- Bind off leaving long tail for sewing.
- Attach to body between Rounds 9 and 25, equally covering MC and AC1. When leg is sewn ¾ around, stuff, then complete attachment.
Hind Feet (Make 2)
- With AC1, ch 2.
- Rnd 1: 5 sc in second ch from hook. (5)
- Rnd 2: Inc in each st around. (10)
- Rnds 3-8: Sc evenly around. (10)
- Bind off leaving long tail for sewing. Stuff lightly. Press last round of Hind Feet flat. Sewing through both layers of the last round, attach across last 4 rounds of hind legs and one round of body. Attach so that first 6 rounds of feet stick out in front of body and act as a stabilizer when body is upright.
Arms (Make 2)
- With AC1, ch 2.
- Rnd 1: 6 sc in second ch from hook. (6)
- Rnd 2: Inc in each st around. (12)
- Rnds 3-4: Sc evenly around. (12)
- Rnd 5: [4 sc, dec] twice. (10)
- Rnds 6: Change to MC, sc evenly around. (10)
- Rnd 7-20: Sc evenly around.
- Bind of leaving long tail for sewing. Press paw flat with a slight curve. Holding paw flat, stuff arm. Do not stuff paw. Press last round flat. Working through both layers of the last round, sew arm to body vertically between Rounds 5 and 10, 4 stitches behind the color change. Sew along arm along top and bottom for 4 stitches to tack down and hold pointing forward.
Tail
- With AC2, ch 2.
- Rnd 1: 6 sc in second ch from hook. (6)
- Rnd 2: Inc in each st around. (12)
- Rnd 3: [sc, inc] 6 times. (18)
- Rnd 4: [2 sc, inc] 6 times. (24)
- Rnd 5: [3 sc, inc] 6 times. (30)
- Rnd 6: [4 sc, inc] 6 times. (36)
- Rnd 7: [5 sc, inc] 6 times. (42)
- Rnd 8: [6 sc, inc] 6 times. (48)
- Rnd 9: Skip 24, 24 sc. Leave skipped stitches unworked. (24)
- Rnd 10: Sc evenly around. (24)
- Rnd 11: [2 sc, dec] 6 times. (18)
- Rnd 12: Sc evenly around. (18)
- Rnd 13: [sc, dec] 6 times. (12)
- Rnd 14: Dec 6 times. (6)
- Bind off and weave in ends. Continue tail by working on unworked stitches from Round 9.
- Rnd 1: Sc join (see Special Stitches), 23 sc. (24)
- Rnd 2-16: Sc evenly around. (24)
- Rnd 17: [2 sc, dec] 6 times. (18)
- Stuff tail.
- Rnd 18: [sc, dec] 6 times. (12)
- Rnd 19: Dec 6 times. (6)
- Bind off, leaving long tail for sewing. Thread yarn through remaining 6 sts and pull tight to close. Sew to body with bottom of tail at Round 22, evenly placed between hind legs, acting as support when body is upright. With scrap yarn, sew center of Round 1 of tail to center of last round of head. Tail will curve along body.
Nose
- With long strand of AC1, sew from the center of the nose, up 2 rounds, and back through center of the nose. Continue in stitches on either side of upper stitch to create a triangle, always threading back through center of nose.
Face Shaping
- Thread yarn up through center of nose and down through stitch 4 rounds straight down from nose. Thread yarn back up through center of nose. Pull tightly to crease snout.
It's All Finished:


