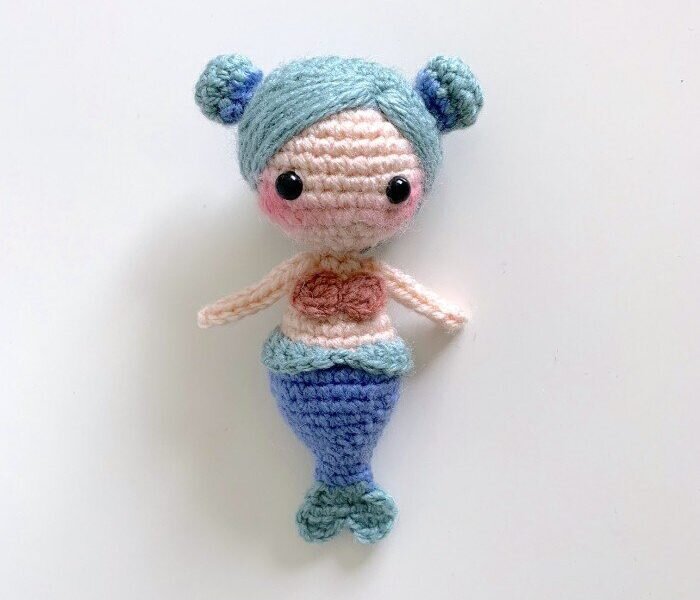
Marmaid Free Amigurumi Pattern
Hello dear Amigurumi enthusiasts! Today I would like to share with you a free Amigurumi Free Pattern pattern and construction instructions. Amigurumi has become a popular hobby in the world of craftsmanship, and in this article I will present you a great Amigurumi Free Pattern design. Trust your imagination while doing amigurumi. And dare to create your own unique designs. Welcome to the Amigurumi world, enjoy fun handicraft projects.
Level: Intermediate
Hook size: 3 mm (US size C)
Materials: Safety eyes (7 mm), stuffing, tapestry needle, scissors, white pipe cleaner
Yarn: Amigo XL
Light Peach (#46) – 1 skein
Vintage Pink (#49) – 1 skein
Verdigris (#25) – 1 skein
Cornflower (#17) – 1 skein
Abbreviations:
MR = Magic ring
ch = chain
sl st = slip stitch
sc = single crochet
dc = double crochet
hdc = half double crochet
inc = increase
dec = decrease
st(s) = stitch(es)
YO = yarn over
(xx) bracket after round = amount of stitches
after ended round
HEAD & BODY
Start with Light Peach
R1: In MR, 6 sc (6)
R2: inc x 6 (12)
R3: (1 sc, inc) x 6 (18)
R4: (2 sc, inc) x 6 (24)
R5: (3 sc, inc) x 6 (30)
R6-R11: 1 sc in each st (30)
R12: (3 sc, dec) x 6 (24)
Attach safety eyes between R9 and R10, 6 sts apart. Begin stuffing the head, and continue
stuffing bit by bit as you work.
R13: (2 sc, dec) x 6 (18)
R14: (1 sc, dec) x 6 (12)
R15: Dec x 6 (6)
R16: 1 sc in each st (6)
R17: Inc x 6 (12)
R18: (3 sc, inc) x 3 (15)
R19: (4 sc, inc) x 3 (18)
R20: (5 sc, inc) x 3 (21)
R21-R22: 1 sc in each st (21)
Switch to Cornflower
R23: In BLO: (6 sc, inc) x 3 (24)
R24: (7 sc, inc) x 3 (27)
R25: 1 sc in each st (27)
Insert a folded pipe cleaner up the neck into head to keep the neck sturdy. Continue stuffing
the body as you crochet.
R26: (7 sc, dec) x 3 (24)
R27: (6 sc, dec) x 3 (21)
R28: (5 sc, dec) x 3 (18)
R29: (4 sc, dec) x 3 (15)
R30: (3 sc, dec) x 3 (12)
R31: (4 sc, dec) x 2 (10)
R32: (3 sc, dec) x 2 (8)
R33: 1 sc in each st (8)
Do not fasten off yet. Make sure your mermaid’s body is stuffed firmly, but be careful not to
overstuff and stretch the stitches. Switch to Verdigris.
R34: Squeeze R33 flat and close it with 4 sc across
R35: Ch 1, turn, inc, 2 sc, inc (6)
R36: Ch 1, turn, inc, 1 sc, 2 sl st, 1 sc, inc (8)
R37: Ch 2, turn, 1 dc, 1 hdc, 2 sl st, 1 hdc, 1 dc, ch 2, 1 sl st
Fasten off and weave in the ends.
HIP FIN
Start with Verdigris.
Attach yarn to the center backside of the doll, at the back loops that were created during R23
of the body.
Work this round in R23’s front loop.
Ch 3, 1 dc in same st, 1 dc in each st, until you reach the middle of the mermaid, 1 hdc, 2 sl
st (this part should be right in the center of the mermaid, see picture), 1 hdc. Then, continue
1 dc in each st.
Join with a sl st to the first dc to complete the round. Fasten off, and weave in the ends.
BIKINI TOP
Start with Vintage Pink.
R1: In MR, (ch 3, 1 dc, ch 3, 1 sl st) x 2. Pull ring tight.
Fasten off with a long tail for sewing to body later.
HAIR CAP
Start with Verdigris.
R1: In MR, 6 sc (6)
R2: Inc x 6 (12)
R3: (1 sc, inc) x 6 (18)
R4: (2 sc, inc) x 6 (24)
R5: (3 sc, inc) x 6 (30)
R6-R10: 1 sc in each st (30)
Fasten off with a long tail for sewing to head later.
HAIR BUN (x2)
Start with Verdigris.
R1: In MR, 6 sc (6)
R2: Inc x 6 (12)
R3: 1 sc in each st (12)
Switch to Cornflower
R4: (2 sc, dec) x 3 (9)
Fasten off with a long tail for sewing to the hair cap later.
ARMS (x2)
Start with Light Peach.
To set up the i-cord: Ch 3, insert hook into 2nd ch from hook, YO, pull up a loop, insert hook
into next ch, YO, and pull up a loop (3 loops on hook)
R1: Drop 2 loops from hook, but hold onto them tightly with your non-hook hand so that they
do not come undone. YO, pull through loop on hook. Insert hook into first dropped loop, YO,
pull through (2 loops on hook) Insert hook into second dropped loop, YO, and pull through (3
loops on hook)
R2-R7: Repeat R1.
To finish, YO and pull through all 3 loops on hook.
Fasten off with a long tail for sewing to the body later.
ASSEMBLY/FINISHING
- To finish the hair, begin by using the tapestry needle to sew the two hair buns to both
sides of the hair cap. Sew the hair cap to the head. Then, sew side-swept bangs to the doll,
one strand at a time. - Sew both arms to the sides of the doll’s body.
- Apply blush powder to the doll’s cheeks using blush powder and a q-tip.
- Add embellishments or accessories to your mermaid, such as beads, ribbons, flowers, or more. Congratulations on finishing your Baby Mermaid!
It's All Finished:


