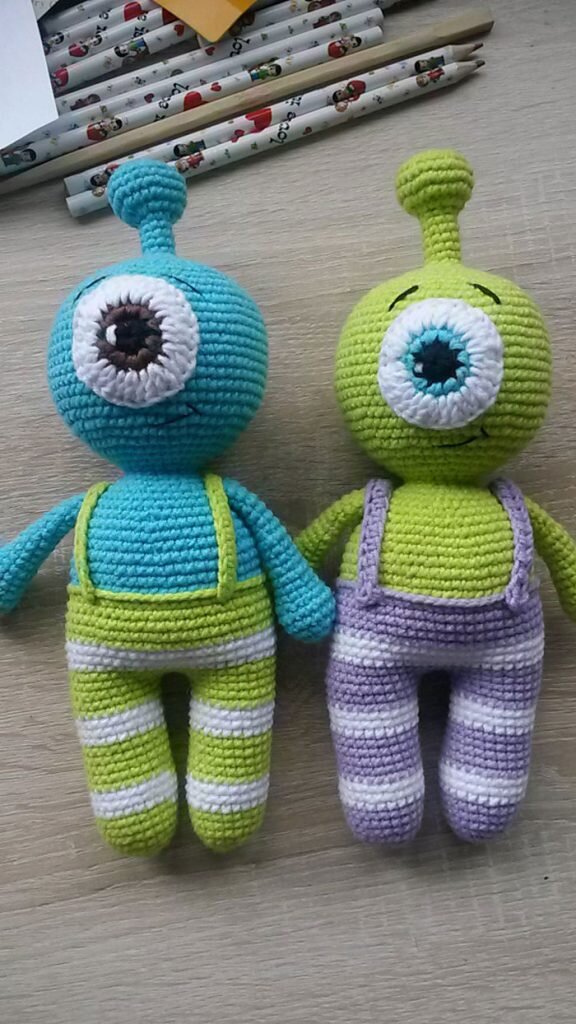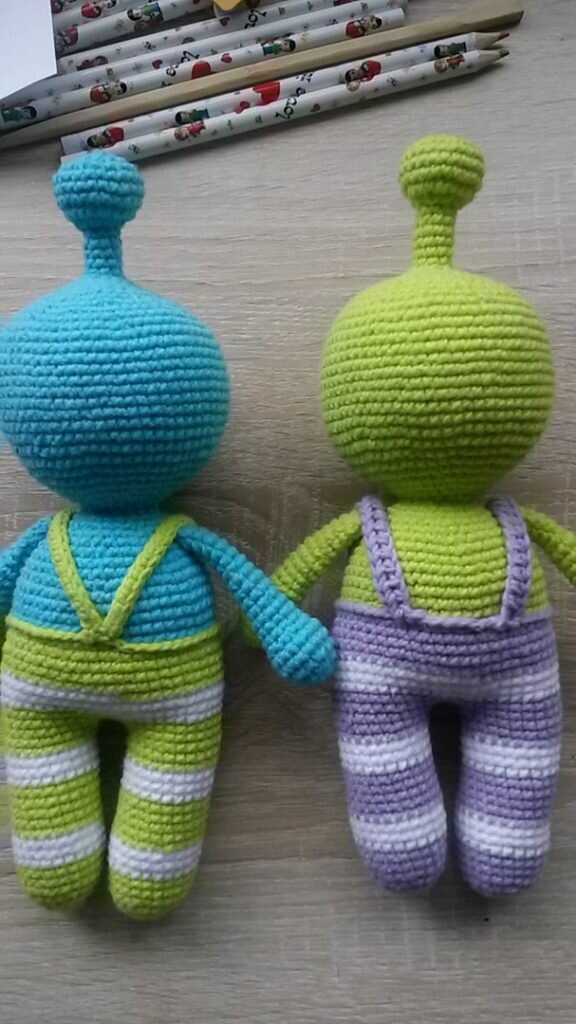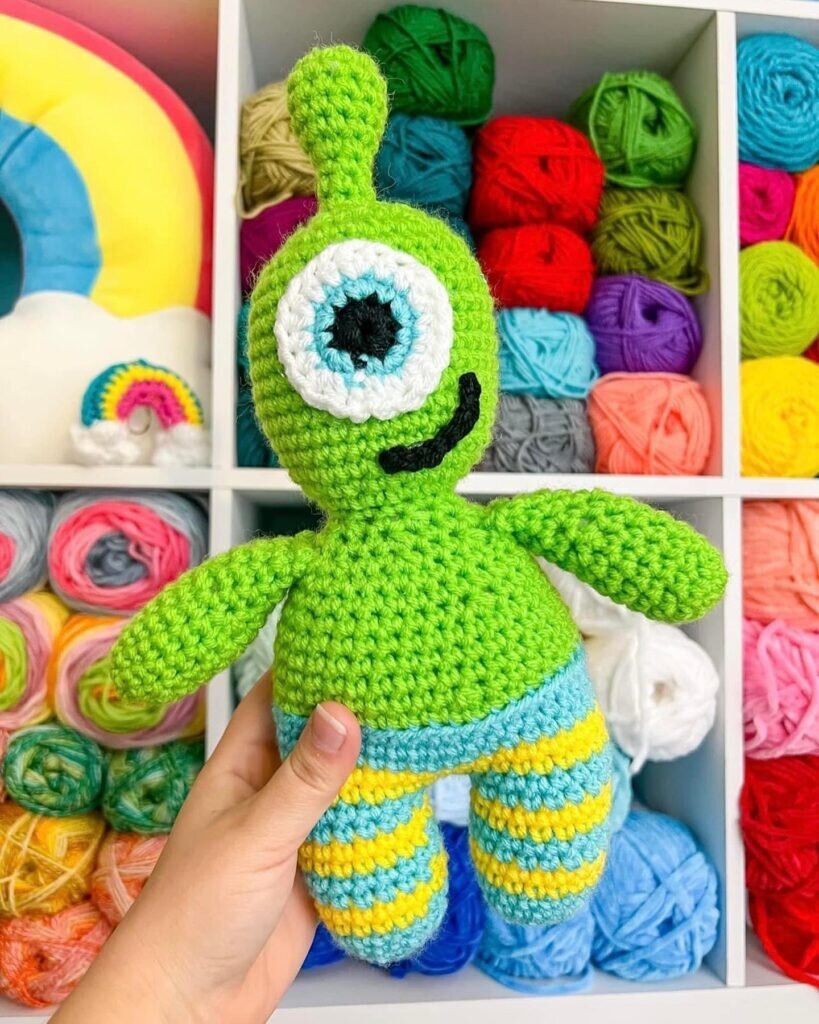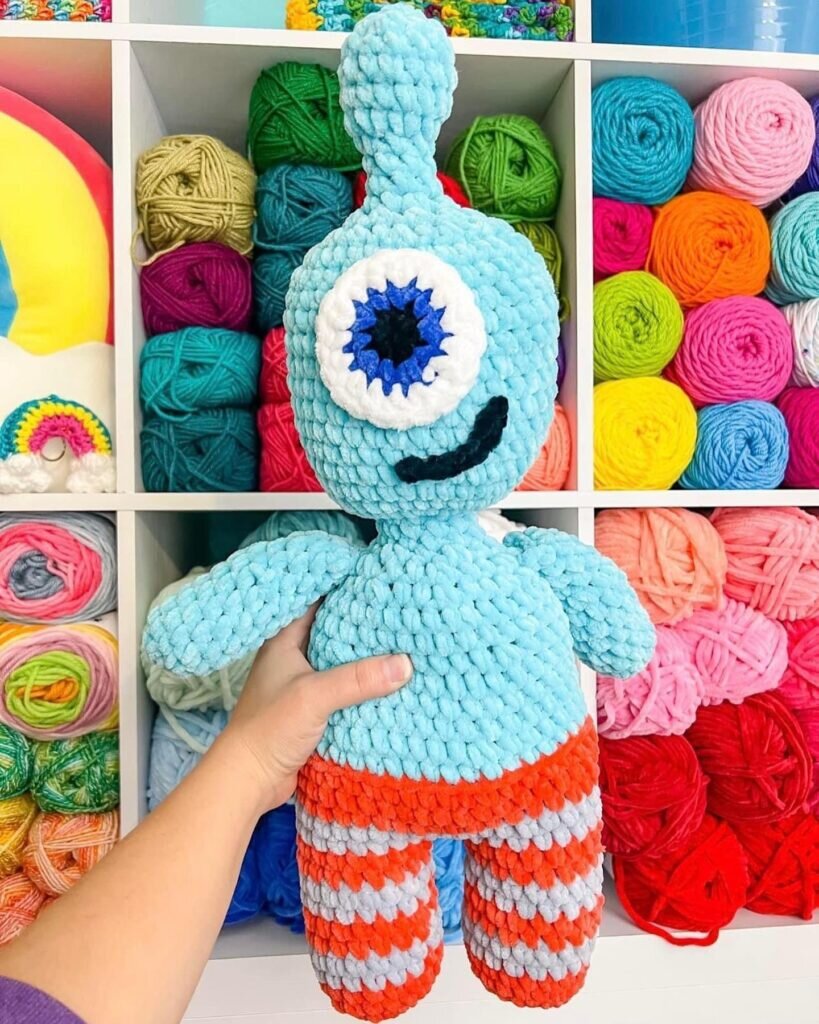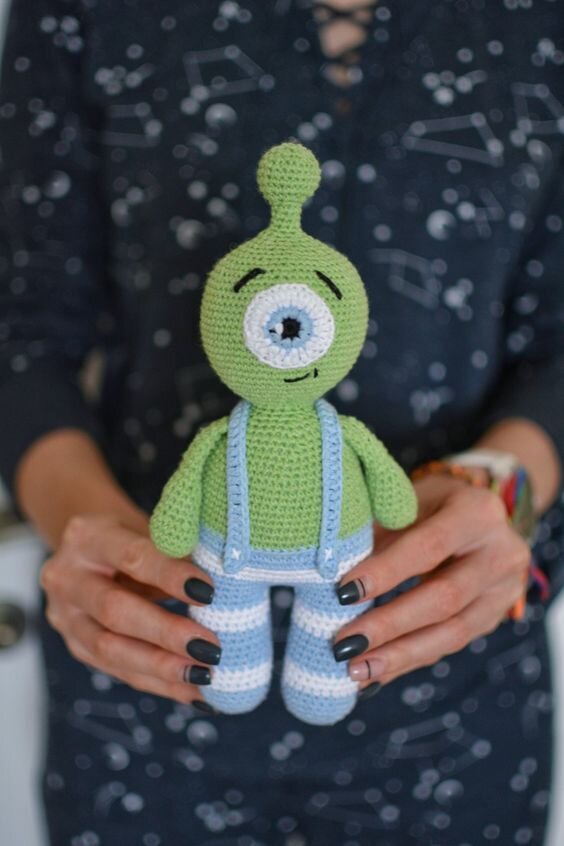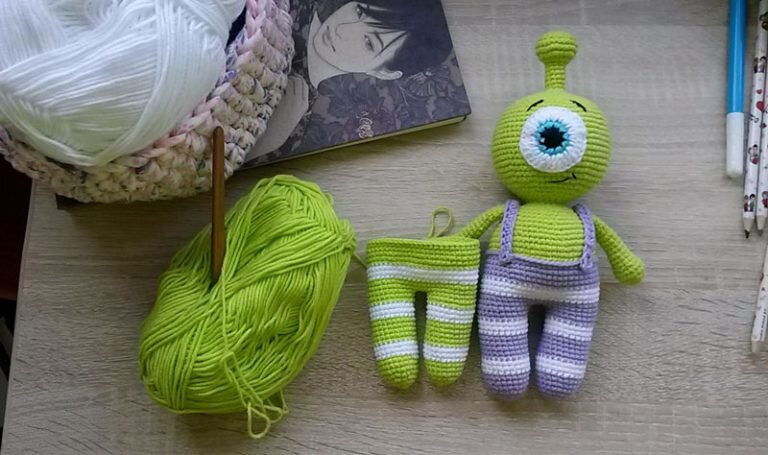
Toy Amigurumi Alien Free Pattern
Hello dear Amigurumi enthusiasts! Today I would like to share with you a free Amigurumi Free Pattern pattern and construction instructions. Amigurumi has become a popular hobby in the world of craftsmanship, and in this article I will present you a great Amigurumi Free Pattern design. Trust your imagination while doing amigurumi. And dare to create your own unique designs. Welcome to the Amigurumi world, enjoy fun handicraft projects.
Legend:
sc – single crochet
inc – increase (2 sc in one loop)
U – decrease
KA – amigurumi ring
Handles
1. 6 sbn in KA
2. 6 inc (12 sbn)
3. (1 sbn, 1 inc)*6 = 18
4-5. 18 sbn
6. (Sbn, y)*6=12
7-9. 12 sc. We stuff the handle, there is no need to stuff the top part, otherwise it will stick out unsightly to the sides.
10. (4 sc, y)*2=10
11-13. 10 sc
14. (3 sc, y)*2=8
15-19. 8 sc
20. Fold the handle in half and knit 3 sc for both halves.
Legs
We knit two parts. And here you are guided by your preferences. My pants are striped, with different thicknesses of stripes, you can make them plain or add more colors. Please note that when changing colors, an ugly skew often results, that is, the colors change diagonally. To prevent this from happening, we make 1-2 offset loops in the row where we change the color.
We start with the main color of the panties
1. 6 sbn
2. 6 inc (12 sbn)
3. (1 sbn, 1 sbn)*6=18
4. (2 sbn, 1 sbn)*6=24
5-7. 24 sc. CHANGE COLOR
8-10. 24 sc +1 offset loop, change color
11-15. 24 sc + 1 or 2 offset loops so that the color change is straight. Change color
16-18. 24 sc. Change color
19-20. 24 sc. We cut the thread on the first leg and leave it on the second.
Body
Connect the legs. We knit with a thread of the same color. We collect 3 air loops on the second leg, attach the first leg (we pass the loop of the 2nd leg through the loop remaining on the first leg, we carefully tighten everything so that there are no holes left). Now we knit sc in each stitch.
21. 24 sbn along the leg, 3 sbn along the ch chain, 24 sbn along the leg, 3 sbn on the other side of the ch chain. (54 sc).
22-23. 54 sc. Change color
24-26. 54 sc. Change color
27-31. 54 sc. We attach a thread of the color of the handles and knit the body. At the same time, we draw out the thread of the color of the pants before work, we still need it.
32. For the back half-loops we knit 54 sc.
For the front half-loops we knit 54 connecting stitches with a thread the color of the panties. Cut the thread and fasten.
Continue with body color thread.
33-35. 54 sc
We stuff the legs tightly, it is most convenient at this stage. We stuff the body as we knit.
36. (7 sc, y)*6=48
37-38. 48 sbn
39. (6 sbn, y)*6=42
40. (5 sbn, y)*6=36
41. Attach the arms. They should be located exactly on the sides. 36 sc.
42. (4 sbn, y)*6=30
43. (3 sbn, y)*6=24
44. (2 sbn, y)*6=18
45. 18 sbn
Head
In order to get a beautifully shaped head, we break up the extensions. You need to stuff it tightly in the neck area so that your head doesn’t fall back. Pack the antenna tightly too!!!
46. (2 sbn, inc)*6=24
47. 1 sbn, inc, (3 sbn, inc)*5, 2 sbn = 30
48. (4 sbn, inc)*6= 36
49.2 sbn, inc, ( 5 sbn, inc) * 5, 3 sbn = 42
50. (6 sbn, inc) * 6 = 48
51. 3 sbn, inc, (7 sbn, inc) * 5, 4 sbn = 54
52. (8 sbn, inc)*6=60
53. 4 sc, inc, (9 sc, inc)*5, 5 sc = 66
54-65. 66 sbn
66. 4 sbn, (y, 9 sbn) * 5, y, 5 sbn = 60 67.
(8 sbn, y) * 6 = 54
68. 3 sbn, (y, 7 sbn) * 5, y, 4 sbn = 48
69. (6 sbn, y) * 6 = 42
70. 2 sbn, (y, 5 sbn) * 5, y, 3 sbn = 36
71. (4 sbn, y) * 6 = 30
72. sbn, (y, 3 sbn)*5, y, 2 sbn = 24
73. (2 sbn, y)*6=18
74. (sbn, y)*6= 12
75. (2 sbn, y) *3=9
76-80. 9 sc
81. 9 inc (18)
82. (2 sc, inc)*6= 24
83-85. 24 sbn
86. (2 sbn, y)*6= 18
87. (sbn, y)*6=12
88. 6
Eye
1. Black thread. 10 sc in KA, ss.
2. Color of the iris. V.p. 10 ave., ss.
3. White thread. 3 v.p. (1dc, inc)*10, ss. Leave the thread for sewing. Embroider a highlight.
Suspenders
Attach a thread to the back, knit a chain from v.p. (20-22). We knit sc or hdc. We knit the second one in the same way. We sew the straps on the front.
It's All Finished: