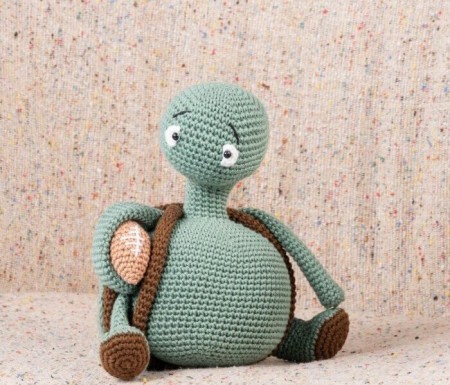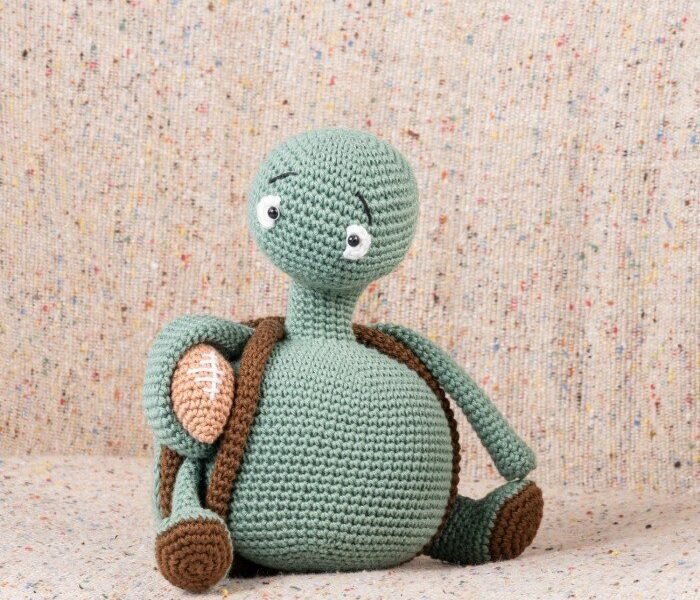
Turtle Free Amigurumi Pattern
Hello dear Amigurumi enthusiasts! Today I would like to share with you a free Amigurumi Tutrle pattern and construction instructions. Amigurumi has become a popular hobby in the world of craftsmanship, and in this article I will present you a great Amigurumi Tutrle design. Trust your imagination while doing amigurumi. And dare to create your own unique designs. Welcome to the Amigurumi world, enjoy fun handicraft projects.
MATERIALS
2 skeins of Rainbow Cotton 8/4, color 098
1 skein of Rainbow Cotton 8/4, color 088
1 skein of Mayflower 8/4, color 1432
Crochet hook 2.5 mm
A piece of black scrap yarn for the eyebrows
A piece of white scrap yarn for the eyes and the football
Safety eyes 5 mm
Fiberfill
ABBREVIATIONS
mr = magic ring
ch = chain
sc = single crochet
sl st(s) = slip stitch(es)
dc = double crochet
inc = increase – 2 stitches in the same st
dec = decrease – 2 stitches together
rnd(s) = round(s)
(xx) = number of stitches after ended round
MEASUREMENTS
Height: 19 cm (7.6”)
PATTERN INFORMATION
Always stuff the head and body firmly.
Work tightly to avoid holes between the
stitches.
All pieces are worked in a spiral.
THE WHITE PART OF THE EYE
In white, make 2
5 sc in a magic ring, DON’T tighten the loop.
Fasten off and leave a tail long enough for assembling.
HEAD
The head and body are crocheted in one piece.
In color 098
Rnd 1: 6 sc in a mr
Rnd 2: (inc) 6 times (12)
Rnd 3: (1 sc, inc) 6 times (18)
Rnd 4: (2 sc, inc) 6 times (24)
Rnd 5: (3 sc, inc) 6 times (30)
Rnd 6: (4 sc, inc) 6 times (36)
Rnd 7: (5 sc, inc) 6 times (42)
Rnd 8: (6 sc, inc) 6 times (48)
Rnd 9: (7 sc, inc) 6 times (54)
Rnds 10-16: 1 sc in each st (54)
Rnd 17: (7 sc, dec) 6 times (48)
Rnd 18: (6 sc, dec) 6 times (42)
Rnd 19: (5 sc, dec) 6 times (36)
Rnd 20: 4 sc, (dec) 6 times, 20 sc (30)
Rnd 21: 4 sc, (dec) 3 times, 20 sc (27)
Rnd 22: 2 sc, (dec) 3 times, 19 sc (24)
Now, attach the safety eyes and place the white part around the eye, then tighten the magic ring.
Attach the eyes between rounds 12-13 with 7 sc in between.
Pull the ends through to the back side and secure them.
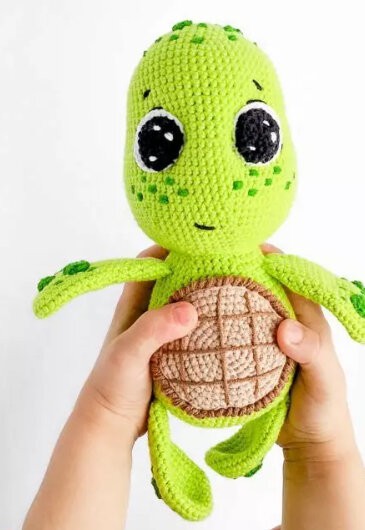
Be careful to attach the eyes on the correct side of the head. The side where the head comes out,
see pictures.
Rnd 23: 1 sc, (dec) 3 times, 17 sc (21)
Rnd 24: (dec) 3 times, 15 sc (18)
Stuff the head with fiberfill as you work.
Rnds 25-31: 1 sc in each st (18)
Rnd 32: (inc) 18 times (36)
Rnd 33: (5 sc, inc) 6 times (42)
Rnd 34: (6 sc, inc) 6 times (48)
Rnd 35: (7 sc, inc) 6 times (54)
Rnd 36: (8 sc, inc) 6 times (60)
Rnd 37: (9 sc, inc) 6 times (66)
Rnd 38: (10 sc, inc) 6 times (72)
Rnds 39-56: 1 sc in each st (72)
Stuff the body with fiberfill as you work.
Rnd 57: (10 sc, dec) 6 times (66)
Rnd 58: (9 sc, dec) 6 times (60)
Rnd 59: (8 sc, dec) 6 times (54)
Rnd 60: (7 sc, dec) 6 times (48)
Rnd 61: (6 sc, dec) 6 times (42)
Rnd 62: (5 sc, dec) 6 times (36)
Rnd 63: (4 sc, dec) 6 times (30)
Rnd 64: (3 sc, dec) 6 times (24)
Rnd 65: (2 sc, dec) 6 times (18)
Rnd 66: (1 sc, dec) 6 times (12)
Rnd 67: (2 sc, dec) 3 times (9)
Fasten off and leave a tail long enough for closing the hole. Use a needle to gather the last 9
stitches in the front loop and tighten the yarn to close the hole nicely. Weave in ends.
SHELL
In color 1432
Rnd 1: 6 sc in a mr
Rnd 2: (inc) 6 times (12)
Rnd 3: (1 sc, inc) 6 times (18)
Rnd 4: (2 sc, inc) 6 times (24)
Rnd 5: (3 sc, inc) 6 times (30)
Rnd 6: (4 sc, inc) 6 times (36)
Rnd 7: (5 sc, inc) 6 times (42)
Rnd 8: (6 sc, inc) 6 times (48)
Rnd 9: (7 sc, inc) 6 times (54)
Rnd 10: (8 sc, inc) 6 times (60)
Rnd 11: (9 sc, inc) 6 times (66)
Rnd 12: (10 sc, inc) 6 times (72)
Rnd 13: (11 sc, inc) 6 times (78)
Rnd 14: (12 sc, inc) 6 times (84)
Rnds 15-31: 1 sc in each st (84)
Rnd 32: (12 sc, dec) 6 times (78)
Rnd 33: (11 sc, dec) 6 times (72)
Rnd 34: (10 sc, dec) 6 times (66)
Rnd 35: (9 sc, dec) 6 times (60)
Rnd 36: (8 sc, dec) 6 times (54)
Rnd 37: (7 sc, dec) 6 times (48)
Rnd 38: (6 sc, dec) 6 times (42)
Rnd 39: (5 sc, dec) 6 times (36)
Rnd 40: (4 sc, dec) 6 times (30)
Rnd 41: (3 sc, dec) 6 times (24)
Rnd 42: (2 sc, dec) 6 times (18)
Rnd 43: (1 sc, dec) 6 times (12)
Rnd 44: (2 sc, dec) 3 times (9)
Fasten off and leave a tail long enough for closing the hole. Use a needle to gather the last 9
stitches in the front loop and tighten the yarn to close the hole nicely. Weave in ends.
SPOTS
In color 098, make 6
Rnd 1: 10 sc in a mr
Rnd 2: (1 sc, inc) 5 times (15)
Rnd 3: (2 sc, inc) 5 times (20)
Rnd 4: (3 sc, inc) 5 times (25)
Rnd 5: (4 sc, inc) 5 times (30)
Rnd 6: (5 sc, inc) 5 times (35)
Finish with 6 sc and 1 sl st.
AMERICAN FOOTBALL
In color 088
Rnd 1: 3 sc in a mr
Rnd 2: (inc) 3 times (6)
Rnd 3: (1 sc, inc) 3 times (9)
Rnd 4: (2 sc, inc) 3 times (12)
Rnd 5: (3 sc, inc) 3 times (15)
Rnd 6: (4 sc, inc) 3 times (18)
Stuff the ball with fiberfill as you work.
Rnds 7-10: 1 sc in each st (18)
Rnd 11: (4 sc, dec) 3 times (15)
Rnd 12: (3 sc, dec) 3 times (12)
Rnd 13: (2 sc, dec) 3 times (9)
Rnd 14: (1 sc, dec) 3 times (6)
Rnd 15: (dec) 3 times (3)
Fasten off.
Embroider stripes on the ball with white yarn.
LEG
Begin with color 1432, make 2
Rnd 1: 6 sc in a mr
Rnd 2: (inc) 6 times (12)
Rnd 3: (1 sc, inc) 6 times (18)
Rnd 4: (2 sc, inc) 6 times (24)
Rnd 5: (3 sc, inc) 6 times (30)
Switch to color 098
Rnd 6: 1 sc in each st (30)
Rnd 7: 11 sc, (dec) 4 times, 11 sc (26)
Stuff only the foot with fiberfill.
Rnd 8: 10 sc, (dec) 3 times, 10 sc (23)
Rnd 9: 9 sc, (dec) 3 times, 8 sc (20)
Rnd 10: 8 sc, (dec) 2 times, 8 sc (18)
Rnd 11: 7 sc, (dec) 2 times, 7 sc (16)
Rnds 12-21: 1 sc in each st (16)
Rnd 22: finish with 5 sc to end at the side.
Fasten off and leave a long tail.
STRAP FOR SHELL (LIKE FOR A RUCKSACK)
In color 1432, make 2
Rnd 1: 6 sc in a mr
Rnds 2-40: 1 sc in each st (6)
Fasten off and leave a tail long enough for sewing.
ARM
In color 098, make 2
Rnd 1: 6 sc in a mr
Rnd 2: (inc) 6 times (12)
Rnds 3-29: 1 sc in each st (12)
Fasten off and leave a tail long enough for sewing.
ASSEMBLING
· Embroider eyebrows on the head diagonally above the eyes.
· Pin the shell to the back but wait to sew it on until later. The arms and legs are going to be
attached hidden under the shell and therefore you will need to be able to move the shell up and
down from the turtle’s back.
· Sew the spots onto the shell as shown in the picture, sew only in the outermost layer of the shell.
· Sew the arm onto the body on round 32, be careful to hide the top of the arm under the shell.
Approx. 3 of the rounds should lie diagonally under the shell.
· Sew the legs onto the body on round 56, and again hide approx. 3 rounds under the shell and
sew them on positioned a bit diagonally.
· Sew the straps onto each side of the shell, at the top as well as at the bottom, and then sew the
shell onto the back of the turtle, all the way around the edge without sewing through arms and
legs.
· Sew on the football under the arm.
It's All Finished:


