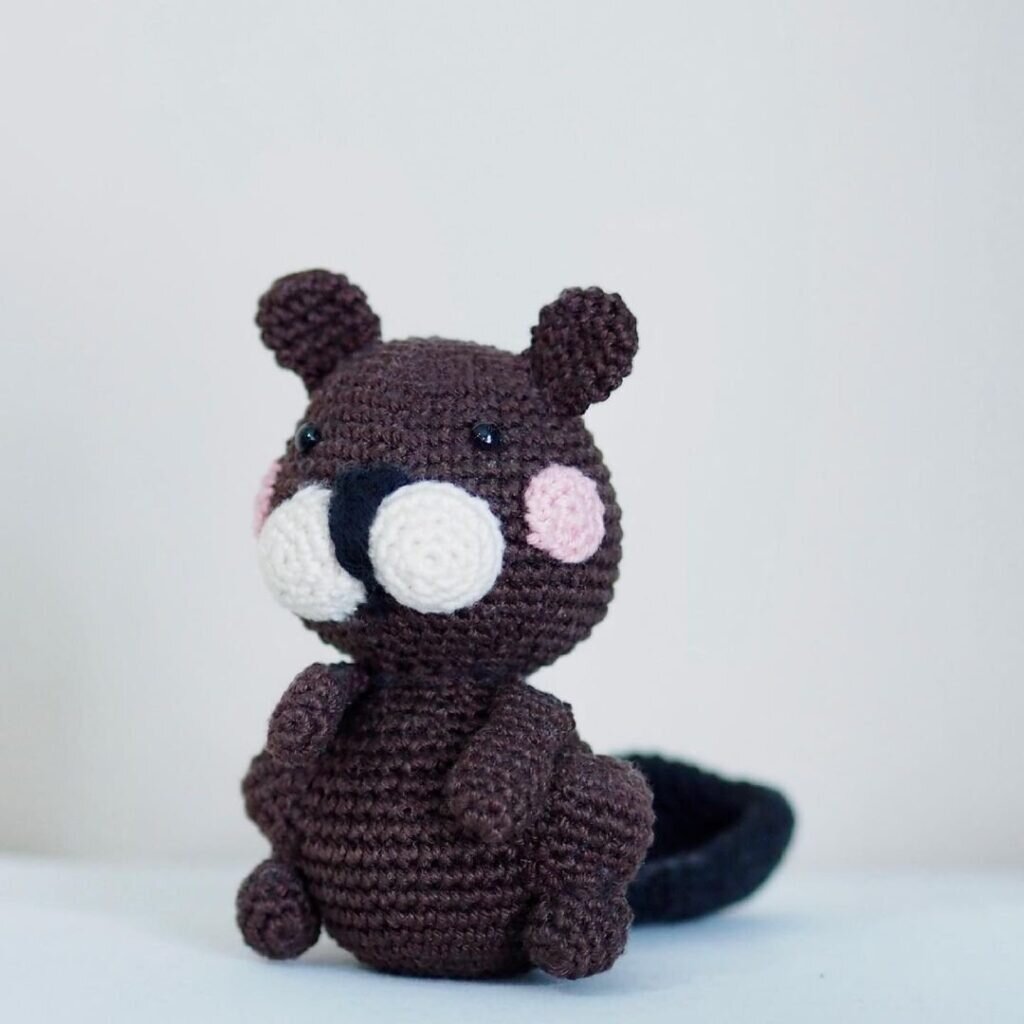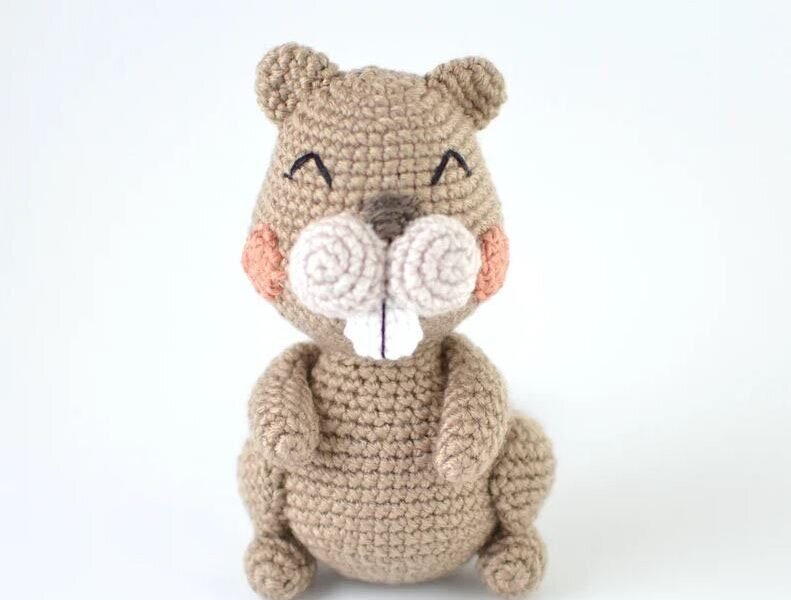
Woody The Beaver Amigurumi Free Pattern
Hello dear Amigurumi enthusiasts! Today I would like to share with you a free Amigurumi Animal pattern and construction instructions. Amigurumi has become a popular hobby in the world of craftsmanship, and in this article I will present you a great Amigurumi Animal design. Trust your imagination while doing amigurumi. And dare to create your own unique designs. Welcome to the Amigurumi world, enjoy fun handicraft projects.
YARN: Light (3) Light Brown, Dark Brown, Cream, Pink; Black Cotton Thread
MATERIALS: 3.25 mm Hook; Poly Filling
DIMENSION: H. 5.5” x L. 3” x W. 5”
ABBREVIATIONS: magic ring (mr), stitch (st), slip stitch (sl st), single crochet (sc),
fasten off (F/O)
SKILL LEVEL: Beginner
INSTRUCTIONS: work in rounds
(join with a sl st and ch 1 at the end of each round) unless otherwise instructed.
HEAD (light brown yarn)
Rnd 1: 6 sc in a mr (6)
Rnd 2: sc inc around (12)
Rnd 3: (1 sc, 1 sc inc) rep around (18)
Rnd 4: (2 sc, 1 sc inc) rep around (24)
Rnd 5: (3 sc, 1 sc inc) rep around (30)
Rnd 6: (4 sc, 1 sc inc) rep around (36)
Rnd 7 – 9: sc even (36)
Rnd 10: (5 sc, 1 sc inc) rep around (42)
Rnd 11: sc even (42)
Rnd 12: (6 sc, 1 sc inc) rep around (48)
Rnd 13: (7 sc, 1 sc inc) rep around (54)
Rnd 14 – 16: sc even (54)
Rnd 17: (7 sc, 1 sc dec) rep around (48)
Rnd 18: sc even (48); start stuffing the head
Rnd 19: (6 sc, 1 sc dec) rep around (42)
Rnd 20: (5 sc, 1 sc dec) rep around (36)
Rnd 21: (4 sc, 1 sc dec) rep around (30)
Rnd 22: (3 sc, 1 sc dec) rep around (24)
Rnd 23: (3 sc, 1 sc dec) rep around (18)
F/O and finish stuffing the head.
TOOTH (white yarn)
Rnd 1: 6 sc in a mr (6)
Rnd 2: sc inc around (12)
Rnd 3: (4 sc, 1 sc dec) rep twice (10)
Rnd 4: flatten the tooth and crochet through both layers, 4 sc
F/O and leave a long tail of yarn to sew the tooth between rnds # 15-16 of the head.
MUZZLE (cream yarn; make two)
Rnd 1: 6 sc in a mr (6)
Rnd 2: sc inc around (12)
Rnd 3: (1 sc, 1 sc inc) rep around (18)
Rnd 4: sc even (18)
F/O and leave a long strand of yarn for sewing the two parts of the muzzle to the head, between rnds # 11-17. Stuff firmly as you sew it. The muzzle will cover part of the tooth.
CHEEKS (pink yarn; make two)
Rnd 1: 6 sc in a mr (6)
Rnd 2: sc inc around (12)
F/O and leave a long strand of yarn to sew the cheeks to the head, between rnds # 13-18.
EARS (light brown yarn; make 2)
Rnd 1: 6 sc in a mr (6)
Rnd 2: sc inc around (12)
Rnd 3 – 4: sc even (12)
F/O and leave a long strand of yarn to sew the ears to the top of the head between rnds # 3-9. Do not stuff the ears, flatten them instead before attaching them to the head.
Embroider the eyes (between rnd # 7-10, 6 sts apart) with black cotton thread.
Embroider the vertical line on the tooth with black cotton thread.
Embroider the nose in between the two parts of the muzzle with dark brown yarn.
BODY (light brown yarn)
Rnd 1: 6 sc in a mr (6)
Rnd 2: sc inc around (12)
Rnd 3: (1 sc, 1 sc inc) rep around (18)
Rnd 4: (2 sc, 1 sc inc) rep around (24)
Rnd 5: (3 sc, 1 sc inc) rep around (30)
Rnd 6: (4 sc, 1 sc inc) rep around (36)
Rnd 7: (5 sc, 1 sc inc) rep around (42)
Rnd 8: sc even (42)
Rnd 9: (6 sc, 1 sc inc) rep around (48)
Rnd 10 – 13: sc even (48); start stuffing the body
Rnd 14: (4 sc, 1 sc dec) rep around (40)
Rnd 15: sc even (40)
Rnd 16: (3 sc, 1 sc dec) rep around (32)
Rnd 17: sc even (32)
Rnd 18: (2 sc, 1 sc dec) rep around (24)
Rnd 19: sc even (24)
Rnd 20: (2 sc, 1 sc dec) rep around (18)
F/O and leave a long strand of yarn to attach the body to the head. Finish stuffing the body while sewing the two parts together.
LEGS (light brown yarn; make two)
Rnd 1: 8 sc in a mr (8)
Rnd 2: sc inc around (16)
Rnd 3: (1 sc, 1 sc inc) rep around (24)
Rnd 4 – 5: sc even (24)
Rnd 6: (2 sc, 1 sc dec) rep around (18)
Rnd 7: (1 sc, 1 sc dec) rep around (12)
Rnd 8: (2 sc, 1 sc dec) rep around (9)
F/O and leave a long strand of yarn. Do not stuff the legs.
FEET (light brown yarn; make two)
Rnd 1: 6 sc in a mr (6)
Rnd 2: sc inc around (12)
Rnd 3 – 4: sc even (12)
Rnd 5: (2 sc, 1 sc dec) rep around (9); stuff the foot
Rnd 6: (1 sc, 1 sc dec) rep around (6)
F/O, leaving a yarn tail. Close the hole and wave in end.
Flatten the legs. Sew each leg to a foot. Sew the leg to either side of the body, approximately between rnds 8-15.
ARMS (light brown yarn; make two)
Rnd 1: 5 sc in a mr (5)
Rnd 2: sc inc around (10)
Rnd 3 – 6: sc even (10)
Rnd 7: (3 sc, 1 sc dec) rep twice (8)
Rnd 8 – 11: sc even (8); stuff the tip of the arm lightly
F/O, leaving a long yarn strand to sew the arms to the side of the body between rnds # 16-20.
TAIL (black yarn)
Rnd 1: 8 sc in a mr (8)
Rnd 2: sc inc around (16)
Rnd 3: (1 sc, 1 sc inc) rep around (24)
Rnd 4: (2 sc, 1 sc inc) rep around (32)
Round 5 – 12: sc even (32)
Rnd 13: (14 sc, 1 sc dec) rep twice (30)
Rnd 14: (3 sc, 1 sc dec) rep around (24)
Rnd 15 – 16: sc even (24)
Rnd 17: (2 sc, 1 sc dec) rep around (18)
Rnd 18 – 19: sc even (18)
Rnd 20: (7 sc, 1 sc dec) rep twice (16)
Rnd 21: (6 sc, 1 sc dec) rep twice (14)
Rnd 22: (5 sc, 1 sc dec) rep twice (12)
Rnd 23: sc even (12)
F/O and leave a long strand of yarn. Do not stuff the tail, flatten it instead before sewing it to the back of the body, between rnds # 7-8.
It's All Finished:

